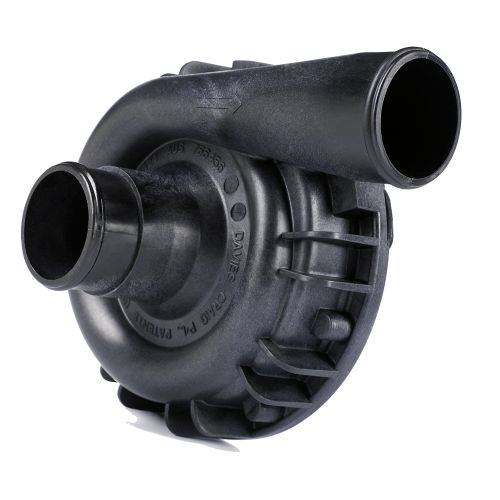
12 Volt | Kit Part Number: #8125
The EWP® Pump-Only option is ideal for replacement, intercooler, charge cooler, or auxiliary water pump applications where wiring is already installed or custom-built.
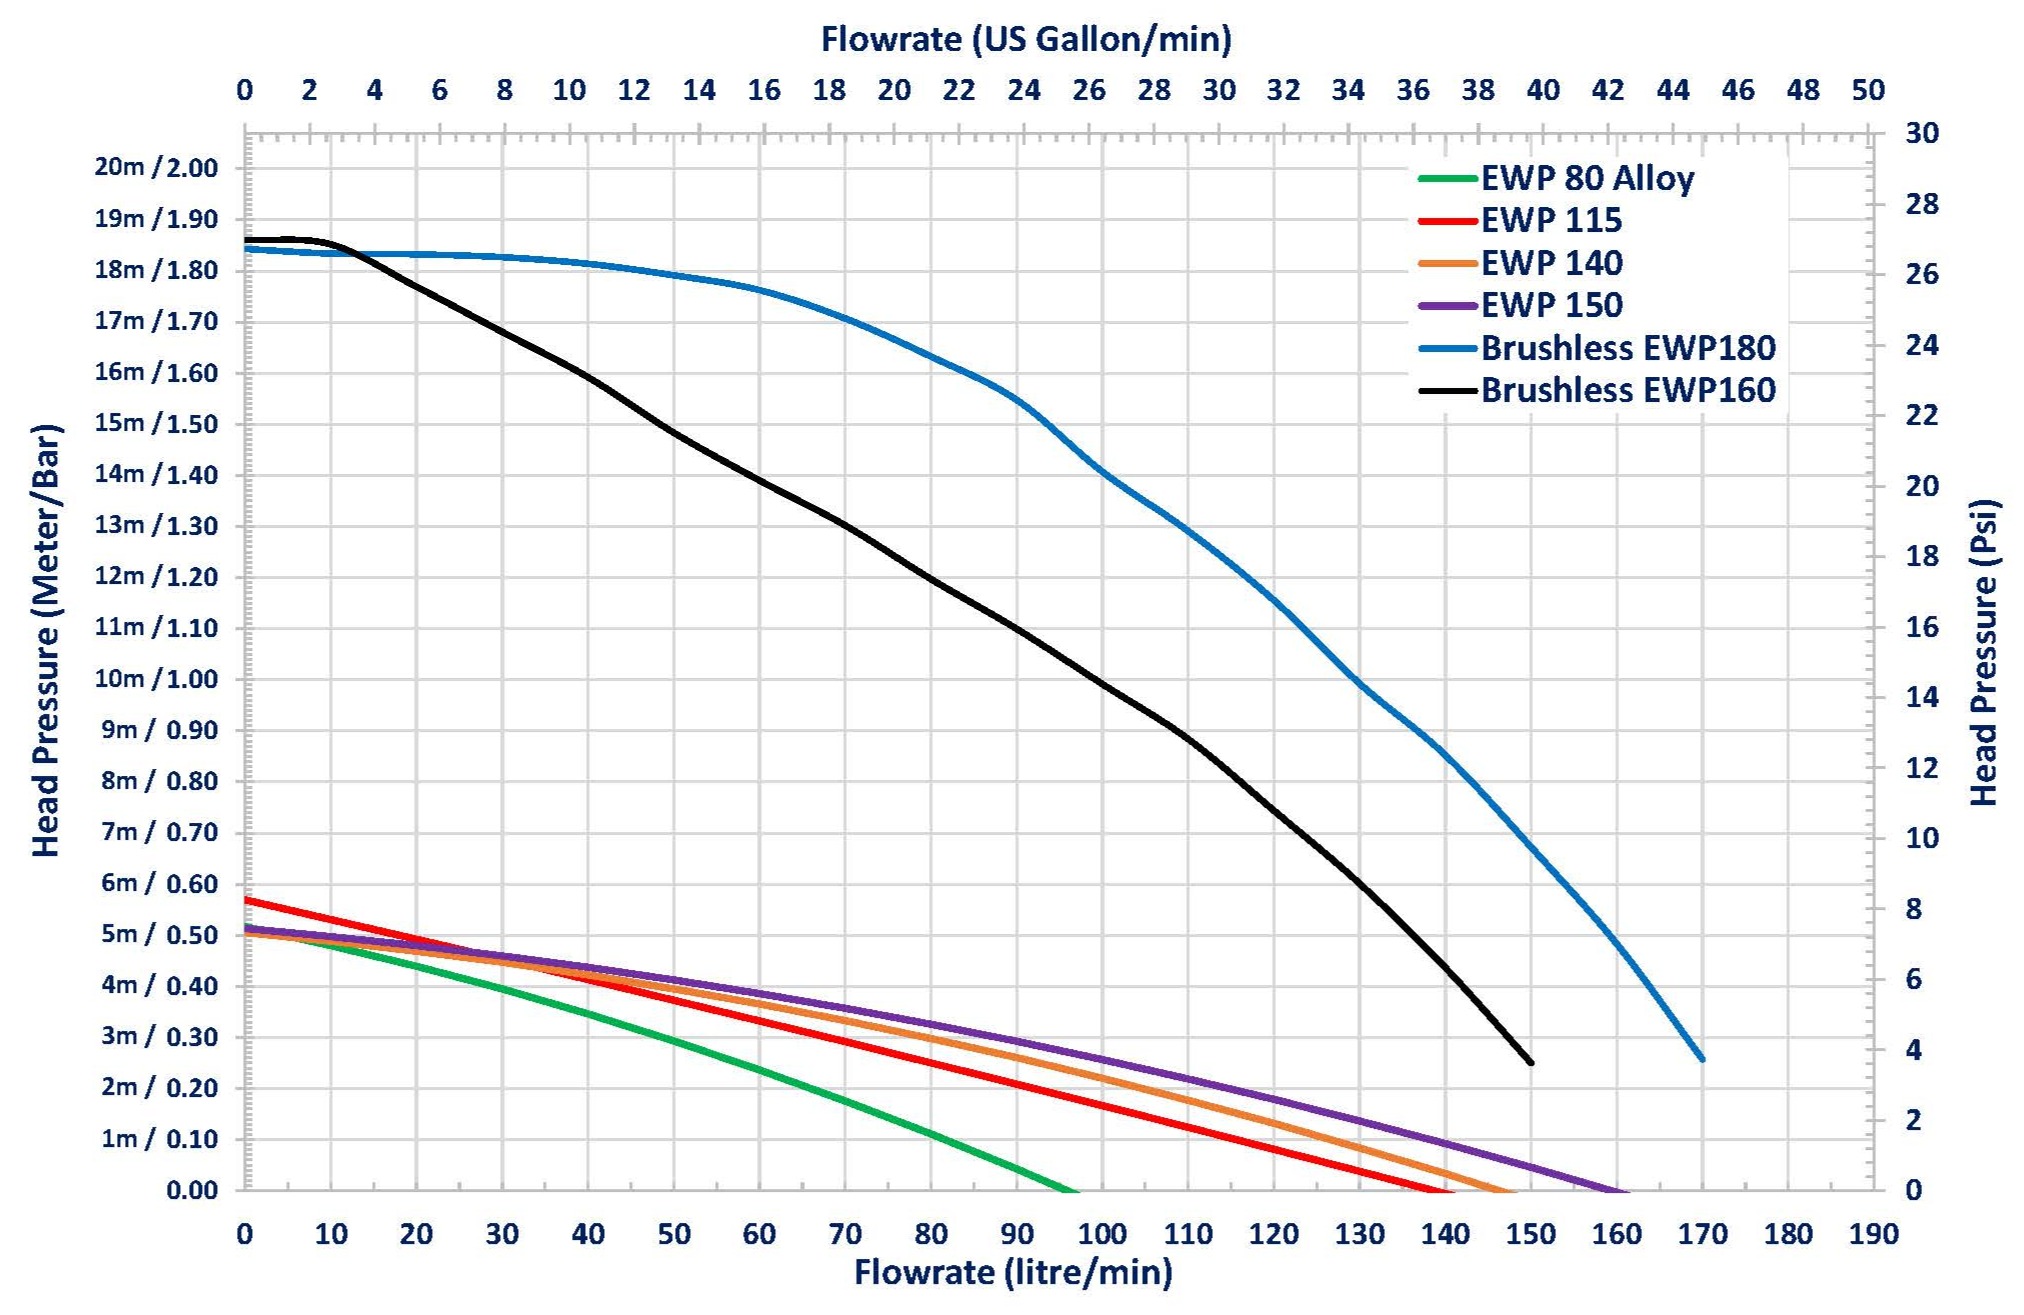
Delivering a massive open flow rate of 139 litres per minute (36.7 g/min)
The EWP®115 Electric Water Pump (12V) is a versatile, high-performance cooling solution suitable for small, medium, large, high-performance and 4WD vehicles.
Designed to improve both cooling efficiency and engine performance, the EWP®115 delivers precise coolant flow independent of engine speed — resulting in better temperature control, increased reliability, and improved overall efficiency.
Built for reliability and efficiency, the EWP®115 is an ideal upgrade for improving cooling performance while gaining usable power and fuel savings.
|
CONTENTS |
|
|
PART DESCRIPTION |
UNITS |
|
EWP®115 (Nylon) 12V |
1 |
|
Technical Specifications |
|
|
Voltage |
12 Volt Pump |
|
Operating voltage |
3V DC to 15V DC |
|
Maximum current |
10A @ 13V |
|
Flow rate (max) |
139 L/min (36.7 US gal/min) @ 13V DC |
|
Operating temp. |
-40° to 120°C |
|
Pump design |
Clockwise centrifugal with volute chamber |
|
Pump weight |
920 grams (2.03 lb) |
|
Pump material |
Nylon 66 - 30% Galss Filled |
|
Burst pressure |
500 kPa (72.5 psi) |
|
Seal |
Ceramic face seal |
|
Self Priming |
No, none of our pumps are self-priming |
|
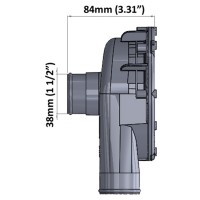
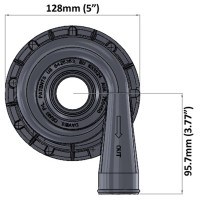
Fits hose sizes |
35mm to 51mm (1⅜” to 2”) Push on Fittings |
|
Push-On fitting Size |
EWP Inlet & Outlet 38mm
|
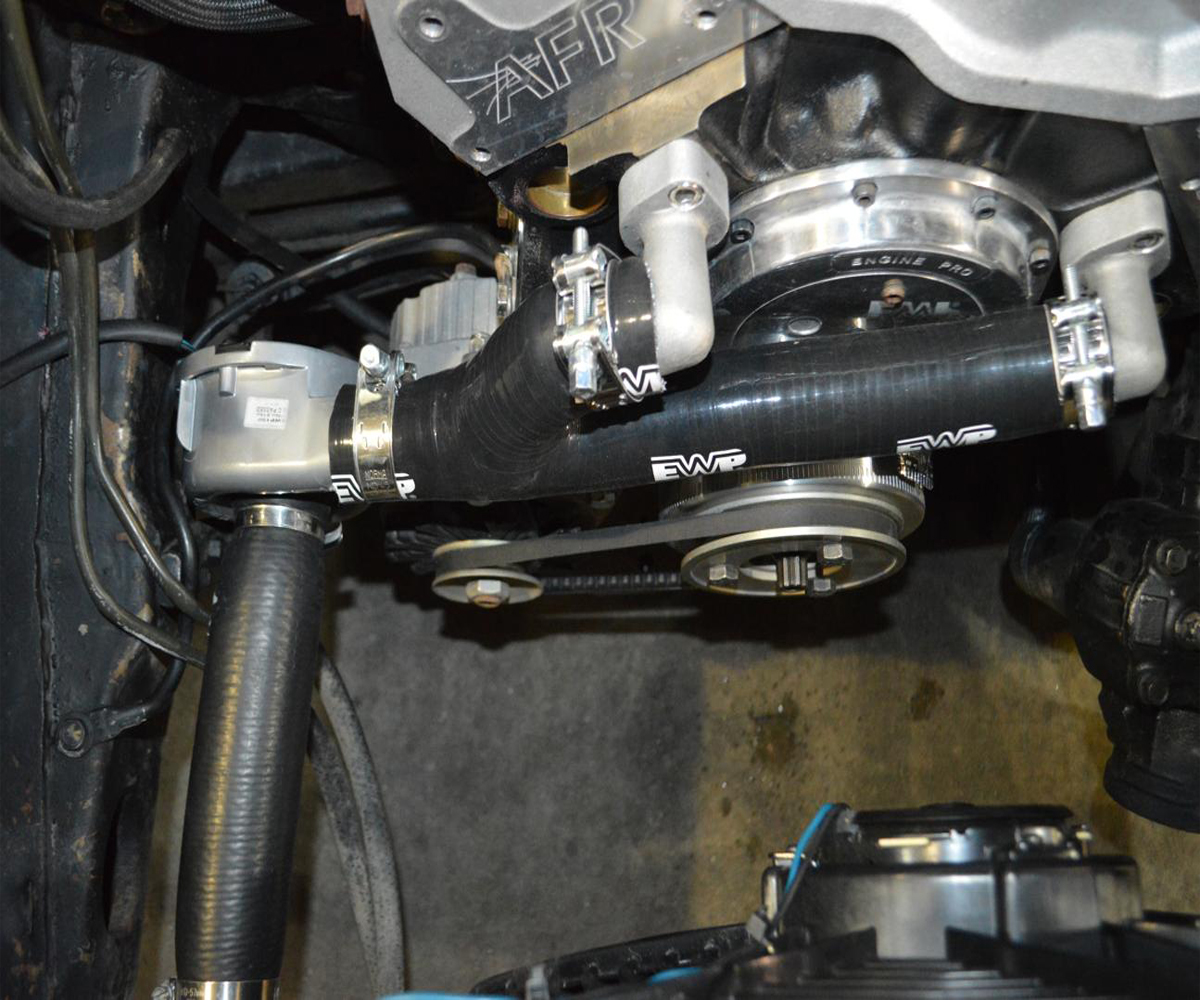
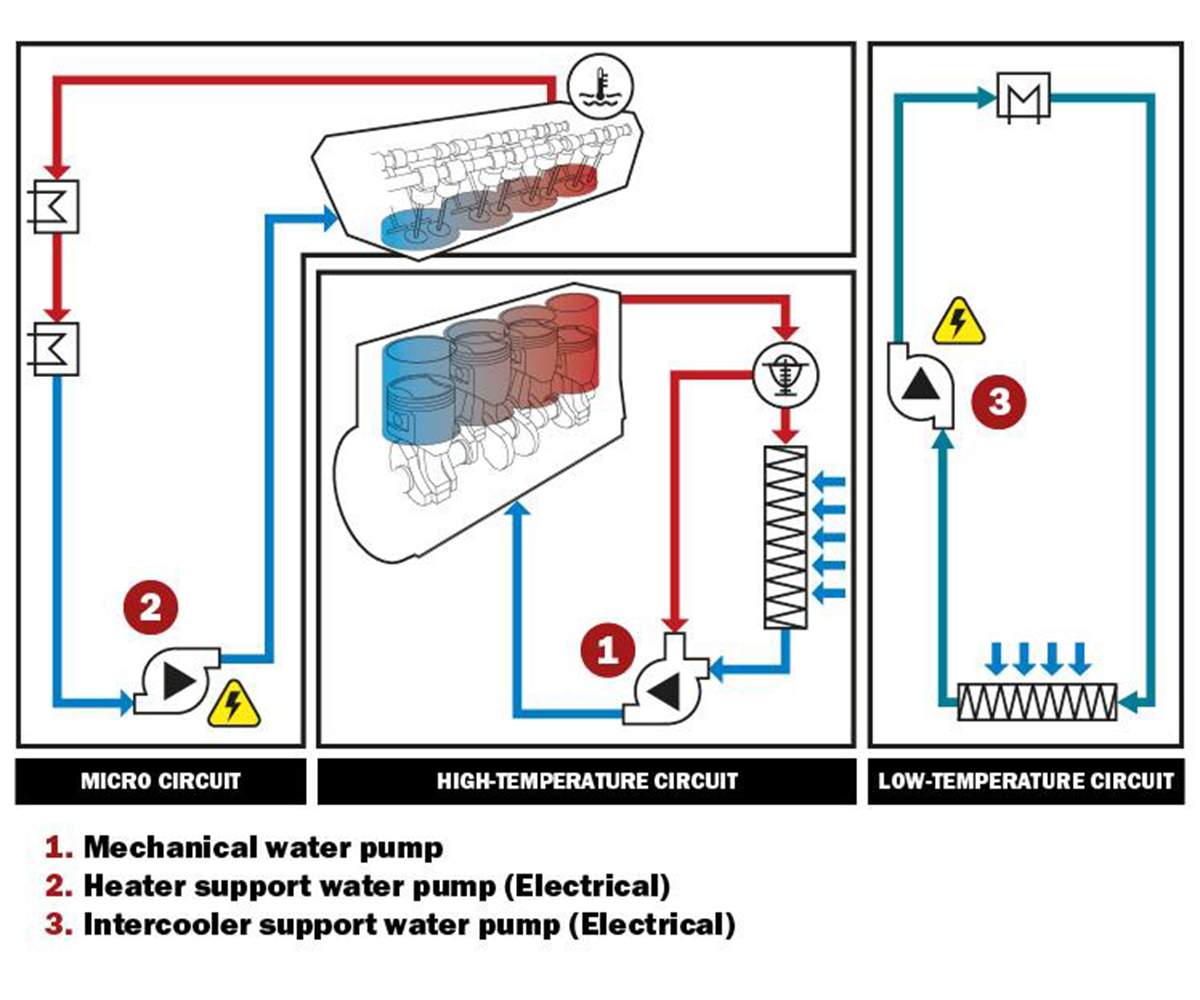
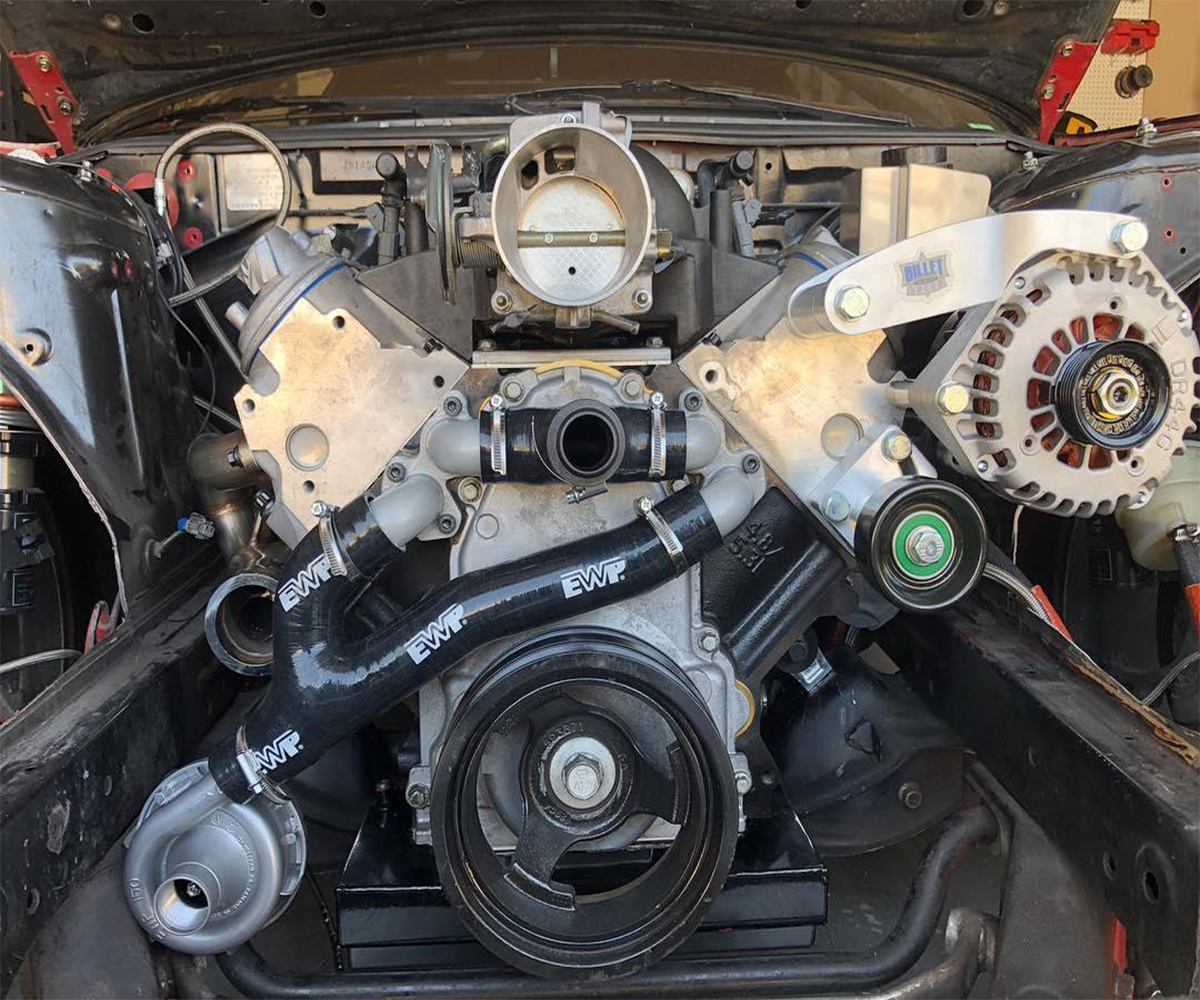
Electric Water Pumps (EWP®) offer flexible installation methods to suit a wide range of vehicles and performance goals. Whether used to enhance an existing cooling system or fully replace a mechanical pump, an EWP® delivers improved cooling efficiency, reduced engine load, and potential fuel savings.
An EWP® can be installed in two primary ways:
Auxiliary Pump (Recommended for simple upgrades)
Installed alongside the factory belt-driven pump, the EWP® significantly boosts coolant flow and heat dissipation.
Performance benefit:
At idle, a mechanical pump typically circulates ~15 L/min. An EWP®150 can add up to 162 L/min, dramatically improving cooling and reducing heat soak.
Upgrading to a digital controller allows the pump and fans to continue running briefly after engine shutdown, helping prevent heat damage to critical components such as the head gasket.
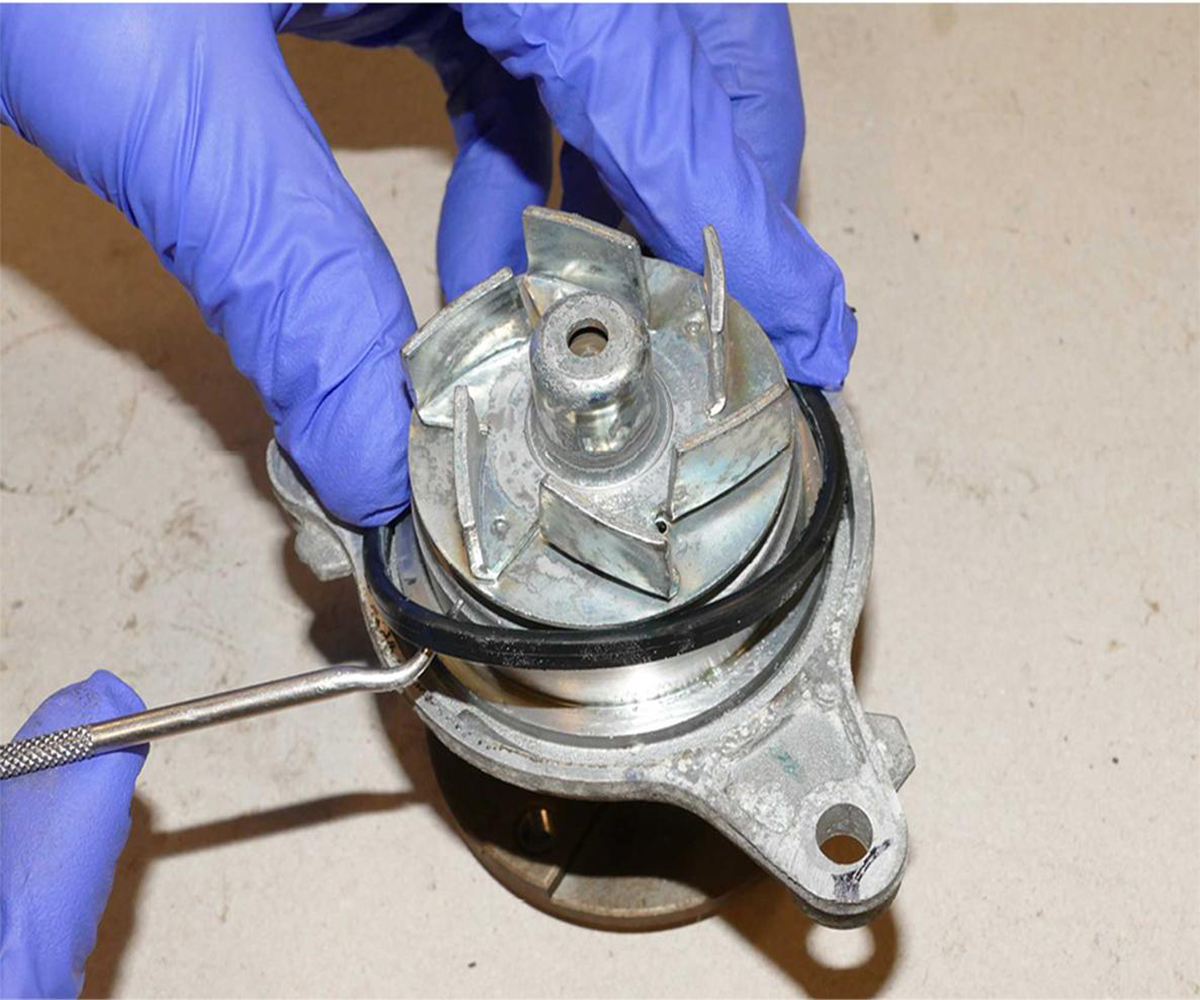
This method retains the original pump housing but removes its function:
Optional (continuous operation):
This approach offers a straightforward installation with minimal modification.
For improved efficiency while maintaining belt routing:
This method reduces parasitic loss while avoiding major belt system changes.
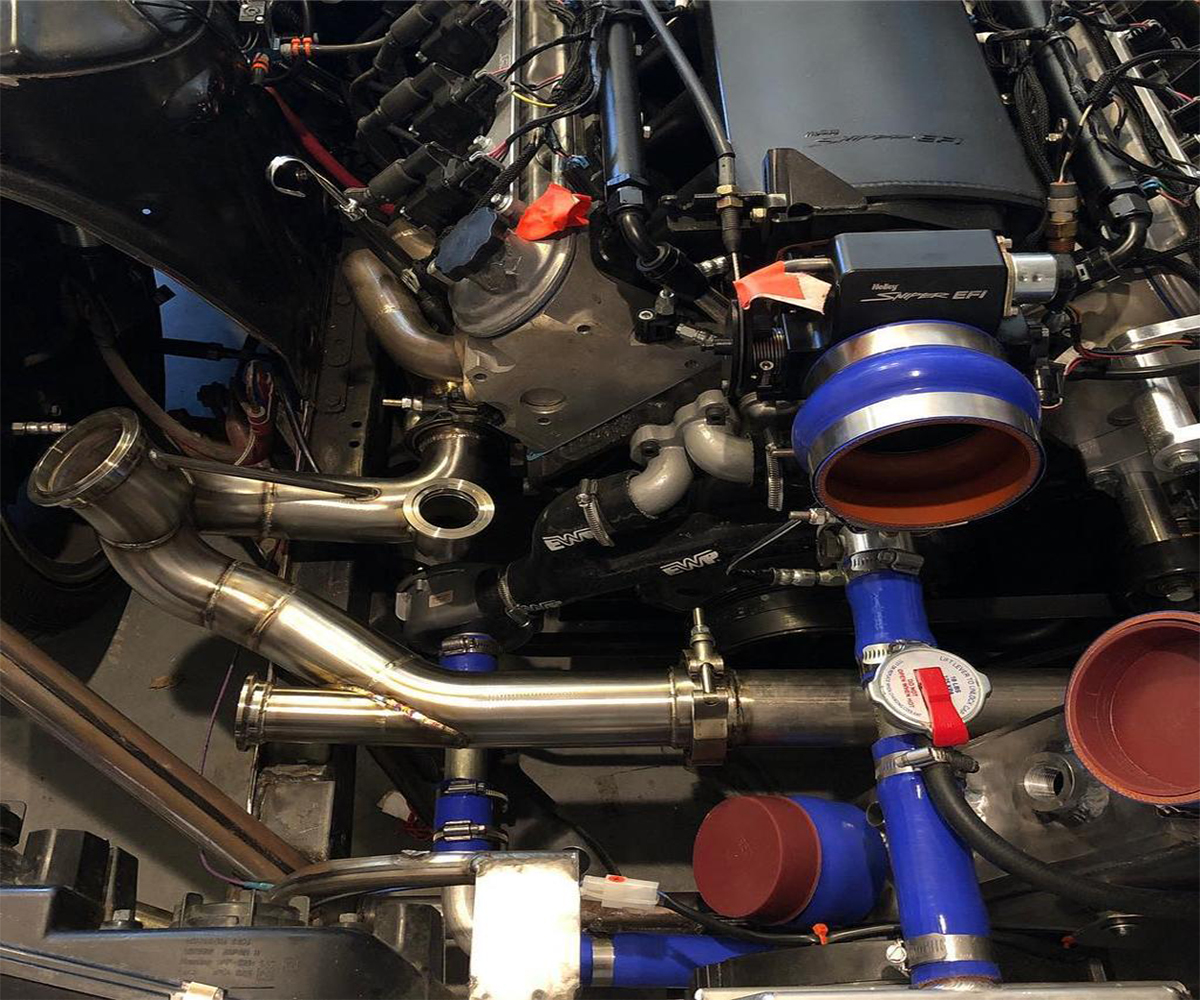

For maximum performance and efficiency:
This setup eliminates mechanical drag and delivers the greatest efficiency gains.
EWP & Controller Installation Demo
ELECTRIC WATER PUMP EWP® & FAN DIGITAL CONTROLLER
12 & 24 Volt | Part Number: #8003, #8103
Provides optimum control of Davies, Craig 12 / 24 Volt Electric Water Pumps and Electric Fans. It Will manage the operation of the EWP® by varying the speed of the pump in response to the coolant temperature and manage control of your electric engine fan.
Designed for precision, reliability, and ease of use, this next-generation controller features an intuitive colour LCD interface and enhanced functionality for complete cooling management.
Engineered to optimise electric water pump and fan performance, the 8003 delivers greater control, improved visibility, and smarter operation—ideal for performance, street, and motorsport applications.
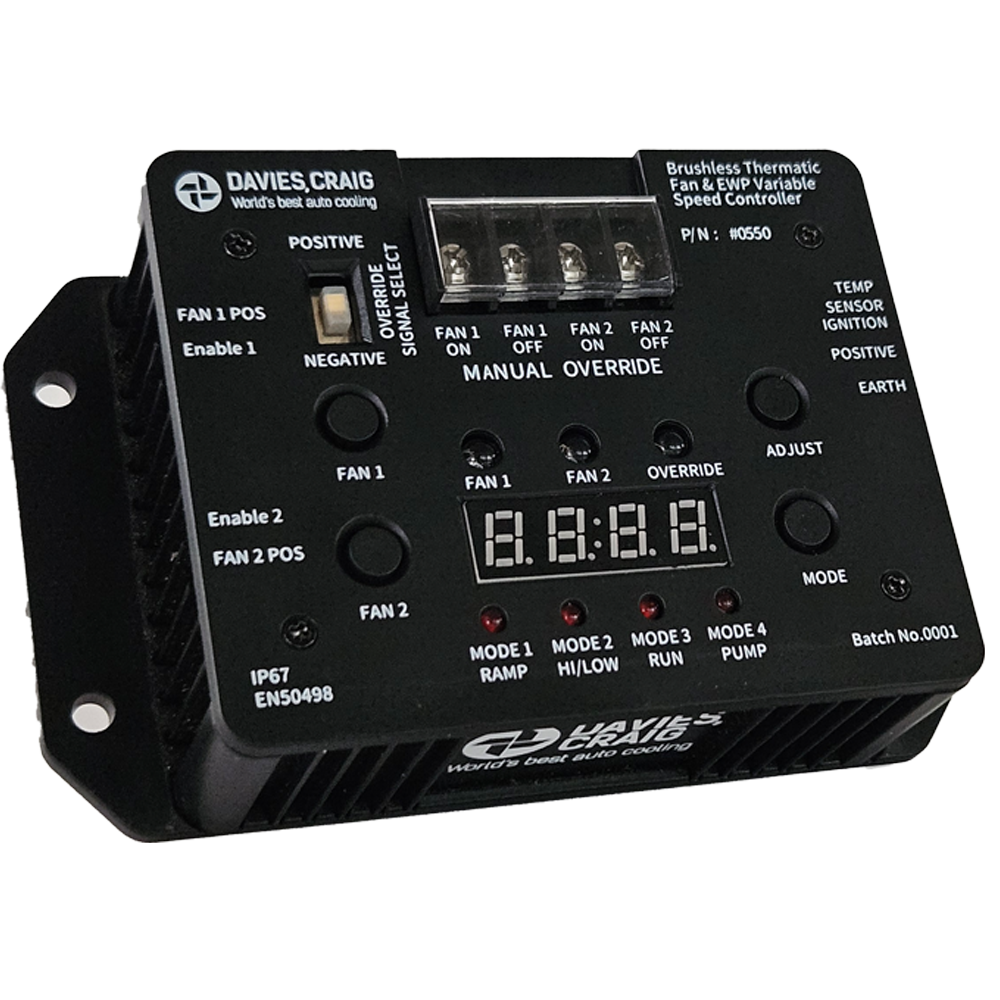
VARIABLE SPEED EWP® & FAN CONTROLLER
12 & 24 Volt | Part Number: #0550, 0551, 0555, 0556
Available for Brushed and Brushless Motor applications. High-performance Controller designed to optimise thermal management in automotive, industrial, marine and EV applications. It provides intelligent, precise control of either Brushless dual Thermatic® Electric Fans or Electric Water Pumps (EWP®), ensuring maximum, efficiency, system protection and reliable operation in the most demanding environments.
DIGITAL THERMATIC® EWP® & FAN SWITCHES
12 & 24 Volt | Part Number: #0444, 0445, 0448, 0435, 0438
Our very own designed Digital Thermatic® Fan Switch Kit can be used with our Thermatic Fans, EWP's and competitors Fans. This is a simple on / off switch that can run 1 or 2 fans and be used for 12 or 24 volt applications. It has an adjustable temperature range of 40ºC to 110ºC (104ºF to 230ºF) which can show Centigrade or Fahrenheit
| EWP® PRODUCT SELECTION GUIDE | |||||||
| APPLICATION |
PUMP MODEL |
PUMP ONLY | PUMP KIT | PUMP COMBO | |||
| 12V | 24V | 12V | 24V | 12V | 24V | ||
| Engines up to 2.0L (Standard) |
EWP®80 | 8106 Flange 8109 Barb |
N/A | 8006 Flange 8009 Barb |
N/A | 8908 Flange 8919 Barb |
N/A |
| Engines up to 2.0L - 3.5L (Standard) |
EWP®115 | 8125 Nylon 8140 Alloy |
8126 Nylon 8141 Alloy |
8025 Nylon 8040 Alloy |
N/A | 8930 Nylon 8950 Alloy |
N/A |
| Engines up to 3.5L - 5.0L (Standard) |
EWP®140 | 8180 Alloy | 8181 Alloy | 8080 Alloy | N/A | 8990 Alloy | N/A |
| Engines 5.0L or greater (Standard) Modified Engines Supercharged/Turbo, Drag Racing, 4WD, Off Road, Drifting & Speedway |
EWP®150 | 8160 Sliver 8165 Black |
8161 Silver | 8060 Silver 8065 Black |
8061 Silver | 8970 Silver 8975 Black |
8971 Silver |
| Intercooler (depending on capacity) |
EWP®115 | 8125 Nylon 8140 Alloy |
8126 Nylon 8141 Alloy |
8025 Nylon 8040 Alloy |
N/A | 8930 Nylon 8950 Alloy |
N/A |
| EWP®140 | 8180 Alloy | 8181 Alloy | 8080 Alloy | N/A | 8990 Alloy | N/A | |
| EWP®150 | 8160 Sliver 8165 Black |
8161 Silver | 8060 Silver 8065 Black |
8061 Silver | 8970 Silver 8975 Black |
8971 Silver | |
| EWP®160 | N/A | N/A | 8430 | N/A | N/A | N/A | |
| EWP®180 | N/A | N/A | 8450 | 8451 | N/A | N/A | |
For further information, see Product Information


